
Starting Seeds Indoors
Spring is officially here the snow is starting to melt (slowly), some of your perennials and shrubs should be showing signs of coming back to life and your spring bulbs will be poking through the soil soon, if they aren’t already. If you haven’t already stated your seeds inside, now is the time. Starting some seeds inside gains you a few extra weeks in our short growing season, which allows you to choose some of the vegetables that have a longer growing time.
In order to start seeds at home you will need the following;
• Seeds
• Clean containers or flats – egg cartons can be used as well
• Soil – We use BM8 soil which has a blend of high quality composted peat moss, that provides beneficial microorganisms to enhance plant growth (can be purchased at both locations)
• Labels – popsicle sticks work well for this
• Marker/pen
• Pencil or stick to poke holes in soil
• Water
Before the planting begins you will want to read all your seed packet instructions. Some seeds need to be chilled, soaked, scratched etc. before planting. Also keep in mind on the instructions for transplanting. Some seeds need to be transplanted into bigger containers as they grow and some seeds don’t like to be moved. It is important to plant according to what is instructed.
Now that you have prepped your seeds as instructed on their packages, they are ready to be planted.
• Fill your clean containers with moistened soil. Most seeds can be gently pressed into the soil, with your pencil or stick. However some seeds are to be covered, some not, some are to be planted with very little soil covering the seed and some might need to be buried ½ an inch in the soil. This is why reading your seed packages is important.
We suggest planting one kind of seed at a time and labeling the containers as you go. It can be quite frustrating trying to figure out what is what, when you are trying to transplant into bigger pots or when transferring your plants into your outside garden.
• Once your seeds are planted they will need watered, you want to be gentle with the watering. Using a spray bottle to mist the planted seeds works well, we have heard turkey basters also work well or a light flowing watering can. Using lukewarm water when watering is usually best as cold water can sometimes shock your seeds and they won’t germinate.
• Now that your seeds are planted and watered, cover the trays with plastic to keep them from drying out, making sure there is a few holes in the plastic to allow some ventilation.
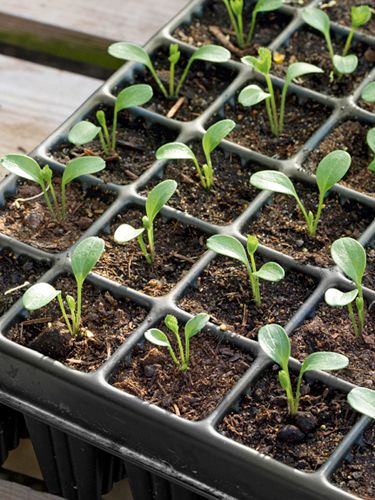
• When your seeds start to sprout remove the plastic and move the trays into a spot that gets lots of sun. If you don’t have a sunny spot you can always set up a station with grow lights. Grow lights should be a few inches above the plants and should be moved up as the plants continue to grow. If you place your seedlings in the sun it is advised that you turn your trays/pots around in different directions. This helps keep your plants growing straight and not bending in the direction of the sun.
• For the seedlings that are to be transplanted into bigger pots, you will know they are ready once they have sprouted their second set of leaves. You can use yogurt container, Styrofoam cups or buy pots from your local hardware store or garden centre. Like before fill your pots with your moistened soil and put a small hole in the soil with your stick or pencil.
• Carefully break up the soil your seedlings are in so the roots can be easily freed. Always lift seedlings by the leaves not the stems when you are moving them. Carefully place them into the new pots planting them as deep as instructed on the seed package.
• Be sure to water them when you are finished transplanting them. Just like before using lukewarm water, misting from a spray bottle or a soft flowing container.
• After transplanting, keep seedlings out of direct sun for a few days, this helps them to become better established in their new pots.
• Now we wait until the weather is warm enough that we can plant our seedlings outside. Make sure to keep seedlings watered as they grow. It is always best to keep inside until after the full moon in June. This year the full moon in June this year is on June 17th
We know planting seeds indoor takes some time, patience, a lot of space in your home and doesn’t always have the results that you had planned for. It is definitely a learning experience and can be mastered quite well over the years of trial and error. If by chance this isn’t your best year for indoor planting or if you’re like me and just don’t have all that much space in your home, for all the seeds you would like to start now. Don’t Fret! We’ve got you covered. We started planting seeds last month in our green house. With our horticultural experts doing the planting, we will have a huge selection of plants (including vegetables) for you to purchase to plant in your gardens, planters, hanging baskets and window boxes this year.